Creating A PHP Nexmo API Client Using Guzzle Web Service Client – Part 4

This is Part 4 in a series, you can read Part 1 here or Part 2 here or Part 3 here or Part 3.5 here.
At this point in this series we have a complete PHP client for the Nexmo APIs. Hopefully I’ve been able to teach some good practices and designs in the process of developing it, but I know many of you test-driven-development advocates are probably screaming that I’ve left out the most important part: testing, and testing early. Well, in order to keep these tutorials focused I’ve saved the testing to the end, and actually when testing API clients I find it easier to write the tests afterwards, but I’ll get into that later.
Testing API clients can be a bit awkward because we generally don’t want to call live APIs during testing. So I usually use a couple different methods of testing the client depending on which part of the client I want to test. I’m sure there are more ways and I’d love to hear about them so please share if you have a technique you like.
The first method I like to use is to create mock responses in Guzzle and attach them to my client so that when my client thinks it makes a request it gets back a real response object, but with the data I’ve provided. The second method is to make real HTTP requests to a mock API service like https://www.mockable.io. There are pros and cons of each approach so lets go over how to do each of them.
Setting up Test Environment
Before we can write and run unit tests we need to setup a few things. First thing is update our composer.json file to require phpunit as a dev dependency. So edit composer.json and make sure you have at least:
{
  "require": {
    "php": ">=5.4.0",
    "guzzlehttp/guzzle": "~5.0",
    "guzzlehttp/guzzle-services": "*",
    "guzzlehttp/retry-subscriber": "*",
    "guzzlehttp/log-subscriber": "*"
  },
  "require-dev": {
    "phpunit/phpunit": "~4.0"
  },
}
composer update.
Next create a tests/ folder at the same level as src/. We need a configuration to give to our client with the key/secret, so lets just create a simple tests/config-test.php file for our tests to use:
<?php return [
    'api_key' => 'abc123',
    'api_secret' => 'zxy098',
];
Okay, that should be sufficient for now.
Using Guzzle mock responses
Using Guzzle Mock Responses is easy and execute very fast. If you want your tests to complete very quickly, this is the way to go since it does not involve making any actual HTTP requests. Createtests/SmsTest.php with the following contents:
<?php
namespace tests;

include __DIR__ . '/../vendor/autoload.php';

use Nexmo\Sms;
use GuzzleHttp\Subscriber\Mock;
use GuzzleHttp\Message\Response;
use GuzzleHttp\Stream\Stream;

class SmsTest extends \PHPUnit_Framework_TestCase
{
    public function testSendSmsMockResponse()
    {
        // Include config file with test data
        $config = include 'config-test.php';

        // Create Mock response
        $mockBody = Stream::factory(json_encode([
            'message-count' => 1,
            'messages' => [
                [
                    'to' => '14085559876',
                    'message-id' => '0300000071BCAA3C',
                    'status' => 0,
                    'remaining-balance' => '15.23280000',
                    'message-price' => '0.00480000',
                    'network' => 'US-VOIP',
                ]
            ]
        ]));
        $mock = new Mock([new Response(200, [], $mockBody)]);

        // Create SMS object with our test config data
        $sms = new Sms($config);

        // Add the mock subscriber to the client.
        $sms->getHttpClient()->getEmitter()->attach($mock);

        // Send a message
        $results = $sms->send([
            'from' => '17045551234',
            'to' => '14085559876',
            'text' => 'test message',
        ]);

        // Make sure results match what we expect
        $this->assertEquals(200,$results['statusCode']);
        $this->assertEquals(1,$results['message-count']);
        $this->assertEquals('14085559876',$results['messages'][0]['to']);
    }
}$ ./vendor/bin/phpunit tests/
PHPUnit 4.6.4 by Sebastian Bergmann and contributors.
.
Time: 83 ms, Memory: 5.50Mb
OK (1 test, 3 assertions)Using a mock API service
Mockable gives you a unique domain name and the ability to setup APIs and responses. You can select what method it should respond on, what the exact path and query string should be, and select the response code, set response headers, and provide the raw response body. Here is a screenshot of what that looks like:
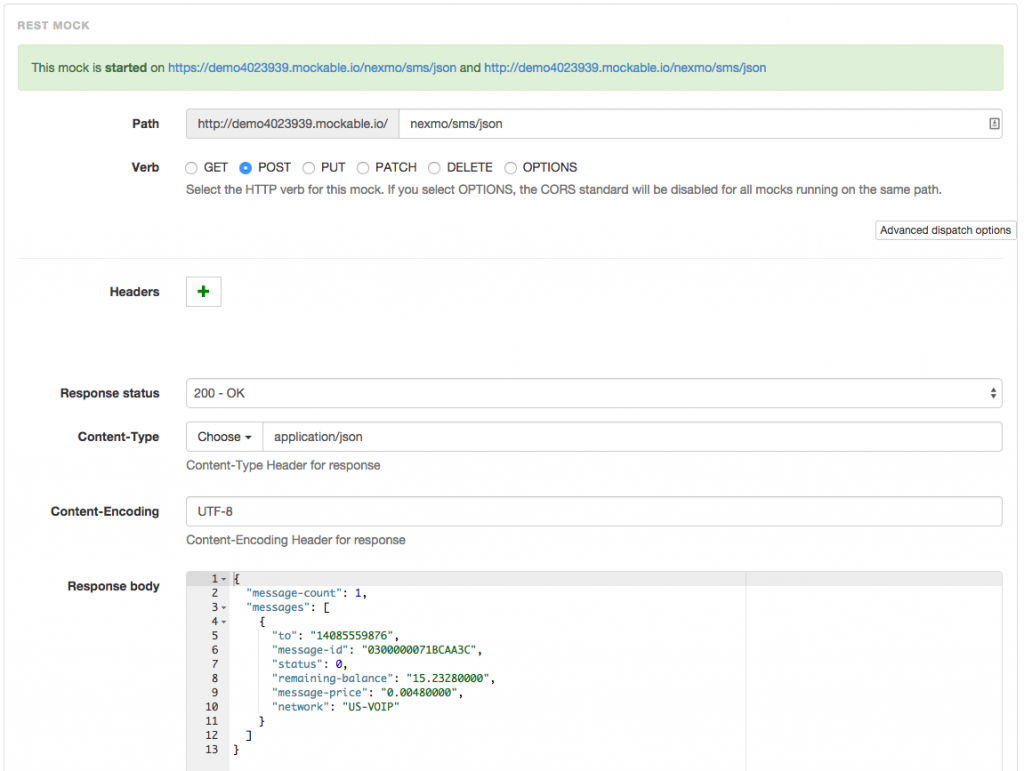
Screenshot of using Mockable to mock Nexmo API
Going this route however requires that we provide some override configuration data to our client so that we can change the endpoint url, so lets create another test in our tests/SmsTest.php file that tests using this mock url instead:
<?php
//...

class SmsTest extends \PHPUnit_Framework_TestCase
{
    public function testSendSmsMockApi()
    {
        // Include config file with test data
        $config = include 'config-test.php';
        // Override baseUrl
        $config += [
            'description_override' => [
                'baseUrl' => 'https://demo4023939.mockable.io',
                'operations' => [
                    'Send' => [
                        'uri' => '/nexmo/sms/json'
                    ]
                ]
            ]
        ];

        // Create SMS object with our test config data
        $sms = new Sms($config);

        // Send a message
        $results = $sms->send([
            'from' => '17045551234',
            'to' => '14085559876',
            'text' => 'test message',
        ]);

        // Make sure results match what we expect
        $this->assertEquals(200,$results['statusCode']);
        $this->assertEquals(1,$results['message-count']);
        $this->assertEquals('14085559876',$results['messages'][0]['to']);
    }

    //...
descriptions/Sms.php file. Now run the tests again:
$ ./vendor/bin/phpunit tests/
PHPUnit 4.6.4 by Sebastian Bergmann and contributors.

..

Time: 497 ms, Memory: 5.75Mb

OK (2 tests, 6 assertions)Wrapping up
Well, I think that is it for this series (unless I think of things I missed or just other helpful content to add). In Part 1 we set the stage for how to make API calls and why a client is helpful. In Part 2 we started our client using Guzzle Services and were able to send an SMS with it. In Part 3 we showed how using the service description method of client development makes it really easy to add support for more APIs. In Part 3.5 we finished describing all the RESTful APIs Nexmo has to offer (until they release that sweet sounding Chat API). Finally in Part 4 we went over how to test the client.I hope you’ve found this tutorial useful and educational. Please send me any feedback you have, whether you want to tell me I’ve done it all wrong like my team usually does, or if you just have questions or ideas for more posts, holla at me.
Links in this article:
Follow me on Twitter: @phillipshipley