How To Automatically Deploy Static Single Page Apps To Amazon S3 And Cloudfront Or CloudFlare Using Codeship
Managing web servers can be a lot of work. Especially when it comes to configuring and maintaining SSL certs, server and software updates, etc. Let’s Encrypt has made the SSL part a lot easier, but it is still work and to me feels like overkill for something as simple as a static single-page-application. Especially when there are dead simple solutions like Amazon S3 that can be used to host and scale a static website without any server configuration or maintenance. Adding CloudFront with a free SSL certificate from Amazon’s Certificate Manager service make SSL painless too.
At work we try to develop our web apps using the pattern of a single page app on the frontend, usually developed with AngularJS and a completely separate RESTful API backend. We maintain each portion of the application as separate Git repositories and each has their own CI/CD (continuous integration and deployment) pipelines.
In this article I’ll cover how to use Codeship’s continuous integration and deployment service to build/test your app, deploy it to S3, and then clear cached versions of it from CloudFront and Cloudflare.
Assumptions:
- You have signed up for an account at https://codeship.com
- You have an Amazon AWS account and created an S3 bucket named “my-app” (note that S3 bucket names are in a global namespace so you’ll have to pick something unique)
- You have a static website or single page application in a Git repo hosted on GitHub, Bitbucket, or GitLab.
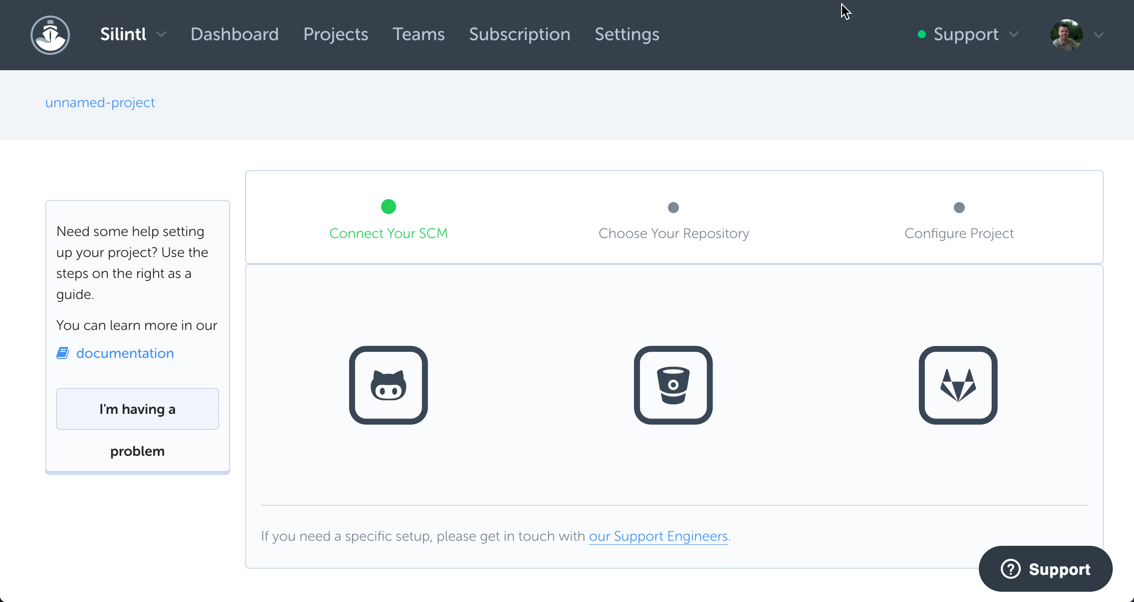
Step 1: Setting up project in Codeship
Adding your project to Codeship is quite simple:- Log in to https://codeship.com
-
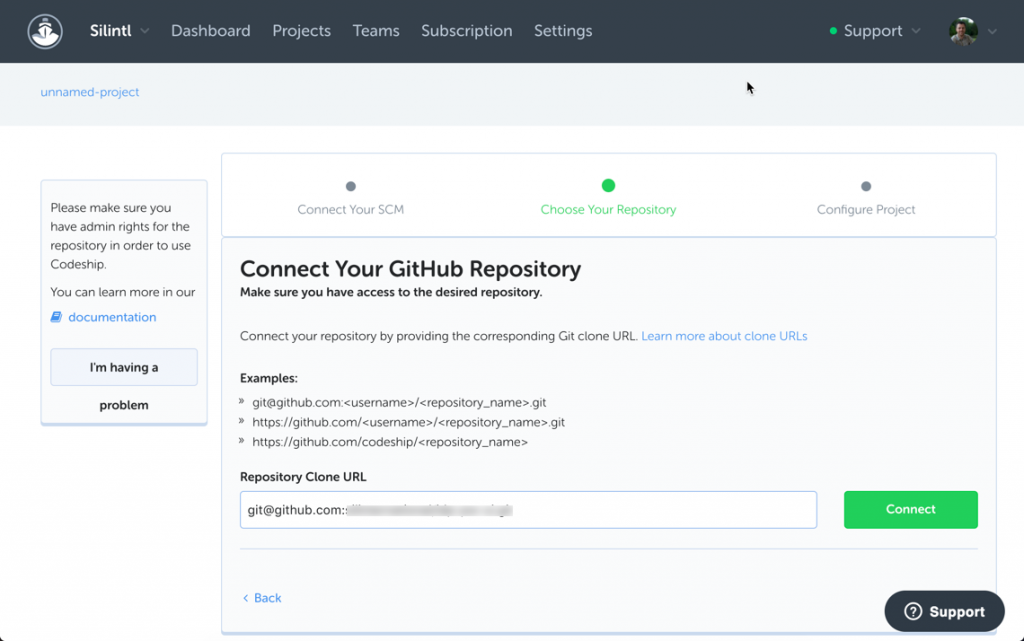
Click on Projects and then New Project. Here you’ll choose which Git hosting provider you use:
-
Paste in the clone url for your repo and hit Connect:
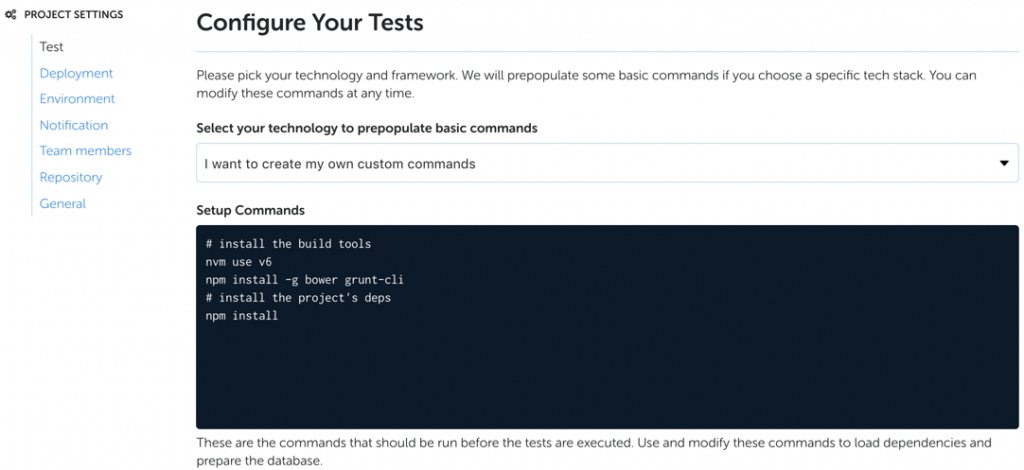
Step 2: Configure Tests
Configuring your tests is at least a two part process. First is setting up the testing environment and second is how to execute tests themselves. This article is not about how to automate testing of your project so I won’t go into details about that but will show you the configuration for one of our projects as an example.Testing is the first phase of the CI/CD process. It occurs for every push to the project repository regardless of the branch or tag. Only if tests pass will Codeship move on to the Deployment phase of the process.
-
Setup commands for test environment. This section lets you perform any actions needed to configure the test environment before running tests. As you’ll see in the next screenshots you can configure multiple parallel testing pipelines, so this setup section applies to them all.
-
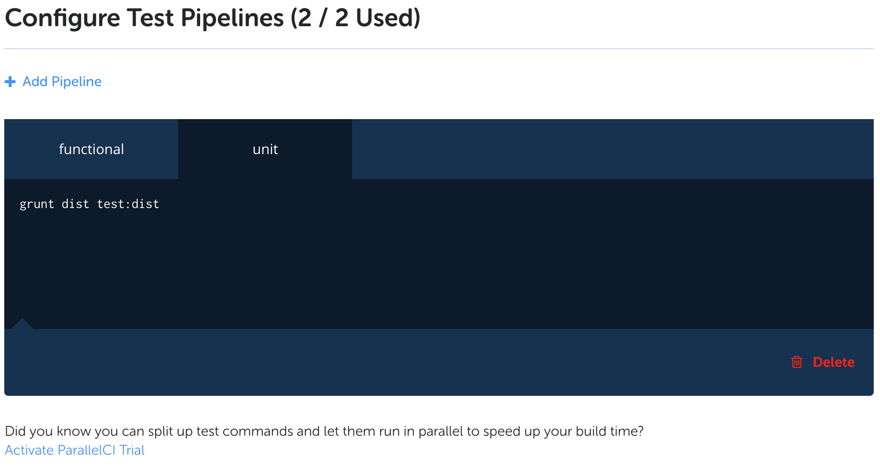
Next configure your test pipelines. Everyone gets two pipelines included in their account but if you need more you can pay for more. What I’m doing in these two tabs is less important than recognizing how awesome it is to separate types of testing and run them at the same time to save time.
Step 3: Configure Environment Variables
In order to make API calls in the deployment process to CloudFront and/or Cloudflare, we need to store credentials as environment variables. If you’re not using CloudFront you can ignore the AWS env vars or if you’re not using Cloudflare you can ignore the Cloudflare env vars. We’re not especially impressed with CloudFront as a CDN and invalidating cache is ridiculously slow, so we use CloudFront for SSL in front of S3, but set cache to zero and use Cloudflare for CDN.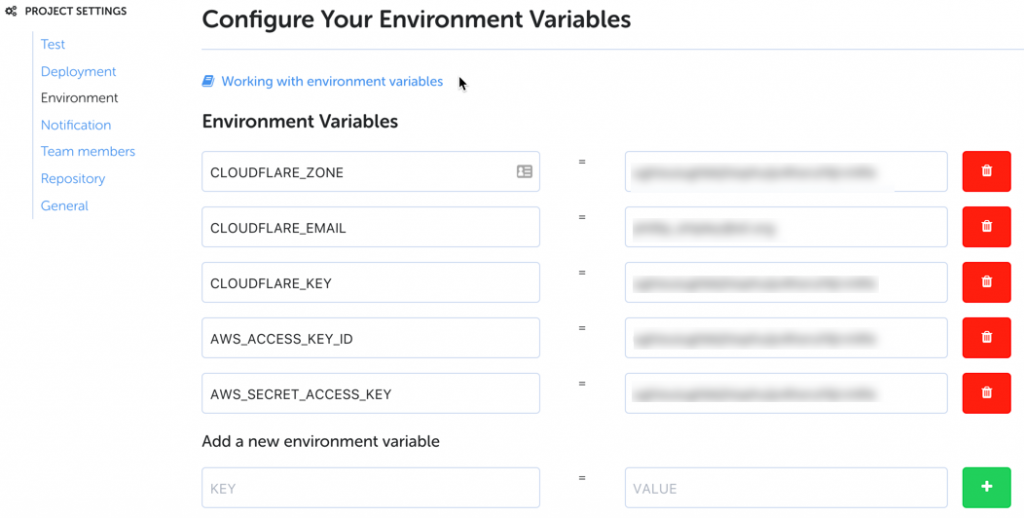
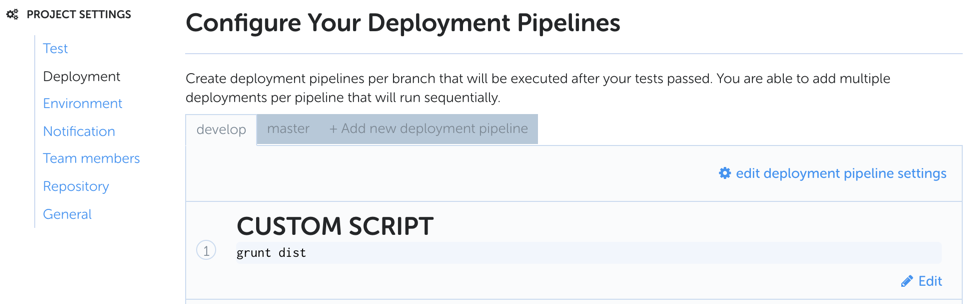
Step 4: Configure Deployment
As mentioned previously, the Test phase happens for every push to your repo, regardless of branch. Deployment however is defined for specific branches. This way you can deploy code to different places based on branch. We use the develop branch for “staging” and the master branch for “production”.Deployments in Codeship are configured as a series of steps. Codeship has many built in integrations to make this process simple, but they also offer a generic shell script option allowing you to do whatever you need. We’ll use a combination of these for this process.

First off in my application we want to use Grunt to build a distributable version of the code, so we use the shell script option:
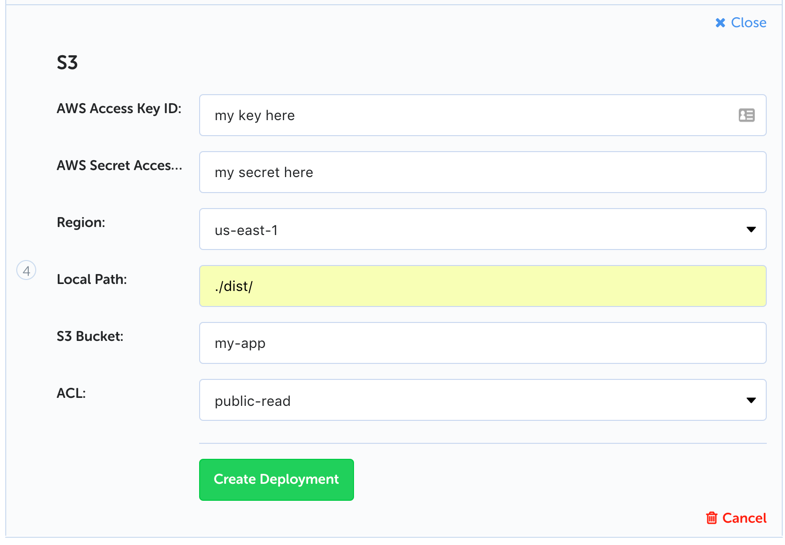
Next up we want to upload the files to S3. For this we’ll use the convenient built in S3 deployment option and configure it with our credentials, the S3 bucket, and default permissions:
Finally, we setup another shell script to invalidate caches on CloudFront and Cloudflare. Again, if you don’t use one of these services you can remove it from the script. Also, you’ll need to update the DistributionId in the CloudFront call to be your CloudFront Distribution ID. Similarly in the Cloudflare call you’ll need to update the URL to your index file.
I guess I should also mention that our Grunt build versions all included assets so files get names like styles.a4b3cc.css and the index.html file is updated to include the latest versions. This helps avoid cache issues for CSS, JS, images, etc. and all we have to worry about is clearing the CDN cache for index.html. We use long cache times (CDN and browser) for everything other than index.html and a very short browser cache time for index.html.
Our third step looks like:
#
# Install AWS CLI
#
pip install awscli
aws configure set preview.cloudfront true
aws configure set preview.create-invalidation true
#
# Create Cloudfront invalidation for index.html
#
aws cloudfront create-invalidation --cli-input-json '{"DistributionId":"DISTRIBUTION_ID_HERE","InvalidationBatch":{"Paths":{"Quantity":1,"Items":["/index.html"]},"CallerReference":"'"`date +%s`"'"}}'
#
# Invalidate Cloudflare cache for index.html
#
curl -X DELETE "https://api.cloudflare.com/client/v4/zones/${CLOUDFLARE_ZONE}/purge_cache" -H "X-Auth-Email: ${CLOUDFLARE_EMAIL}" -H "X-Auth-Key: ${CLOUDFLARE_KEY}" -H "Content-Type: application/json" --data '{"files":["https://my-app.com/index.html"]}'
Let me walk through that final step in a bit more detail to explain what is happening.
- First we need to install the aws-cli and enable preview mode so that we can create CloudFront invalidations using the CLI.
- Next we create the invalidation for index.html. An important thing to note is the “CallerReference” value is being set using a bash call to “date +%s”. The value of this field must be unique so we just use the current timestamp.
- Finally we invalidate the Cloudflare cache using a CURL call to their API. Be sure to update the URL to match yours.
You may be wondering why I used env vars for some of the parameters (credentials) and not for others (distribution id and url). This is because the creds are the same for both develop and master branch deployments but the distribution id and urls change , so the script changes slightly between the two deployment plans.
Well, I hope that helps you in your CI/CD process to automate more of the things. I plan to write a similar article soon focused on how we use Codeship to build, test, push, and deploy our Docker based applications to Amazon ECS.